How to Sew an Ironing Mat
- Kat Zimmermann
- Jun 3, 2022
- 8 min read
Updated: Jul 22, 2024

First, I must confess that this is going to be in two parts as (1) sewing projects seem to always take double the time I allot them and (2) I am afraid of the machine quilting part of this process. In this part, we'll look at the design process, discuss materials, and walk through steps to prepare the ironing mat for quilting. In part two, I'll discuss my newfound learnings of machine quilting, add the binding, and mount the mat to my crafting table.
Before we get going, a few details:
Q: What materials do I need to make an ironing mat?
A: To make this project as shown, you will need:
Quilter's cotton fabric (center and backing) - I purchased 4 yds of 44 in wide fabric
Quilter's cotton fabrics for he backing center stripe and squares along the outside of the top - enough for 38 squares measuring 6x6 in, and 4 rectangles at 7x6 in, plus one 73x4.5 in stripe - the squares are a great stash buster!
Batting - see notes below
Insul-bright batting - optional but recommended - see notes below
Wide bias tape - approximately 7 yds
Fabric weights - optional but recommended for cutting
Scissors or rotary cutter and mat
Ruler or quilter's square(s)
Straight pins
Sewing machine
Regular thread (to assemble the pieces)
Quilter's XL safety pins
Machine quilting thread
Walking foot and free-hand quilting (AKA darning) foot
Hand needle and thread if you will baste by hand
If you will roll and mount the ironing mat as I will in part 2, you will also need:
Garment or twill tape
1/2 inch drywall screws (or size appropriate for where you are mounting)
Q: How long does it take to make this project?
A: I have been working on this project on and off for a few months now, so I cannot be very precise here. I would estimate it took about 2 hours to cut and press all of the pieces, another 2 hours to sew together the top and backing, and then about 1 hour to assemble the layers with the safety pins. I did not have enough safety pins to baste around the edges, so it took me about 30 minutes to baste around by hand. How long it takes to quilt, finish, and mount remains to be seen.
Designing your Ironing Mat

Ironing mats are useful for a variety of reasons. Many quilters prefer a small, hard ironing mat to save space as they only need to press small pieces at a time. Others prefer to use soft ironing mats for travel as they can easily be rolled up and stored in luggage. Personally, my newly built crafting table takes up a lot of space in my sewing room and, once my antique sewing machine's cabinet and treadle are finally restored, the only place for my ironing board will be an awkward interruption to the rest of my workflow.
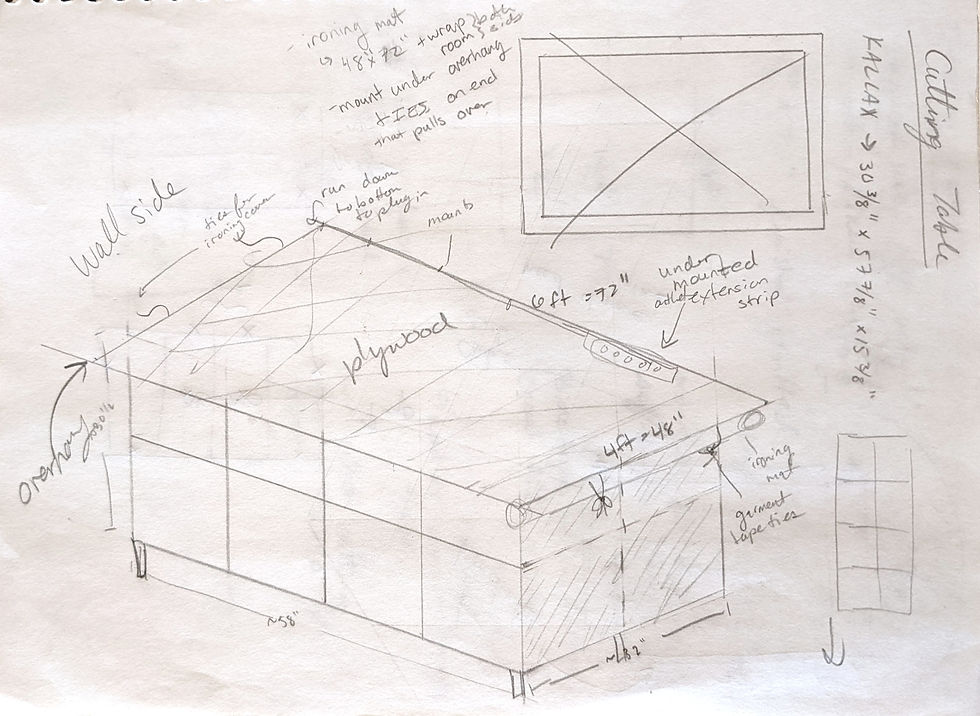
I also typically make larger items like garments which don't fit on my ironing board very well - the only solution is an absolutely massive ironing mat to sit on my absolutely massive crafting table. I've actually had this planned out in concept since before beginning to build the table - see the rolled and stored ironing mat in the table sketch? It's exciting to see the chapter on the table finally coming to a close after nearly six months of on and off work.

(Size) This was the first consideration in designing my ironing mat. The tabletop is quite large (4 by 6 feet) but it's the right size where I can still reach the center of the table without straining and the positioning of the table lets me walk around 3 sides of the surface.
I wanted the ironing mat to fully cover the tabletop. As I delved deeper into deciding what materials to use, discussed below, I discovered that was not going to be possible and narrowed the ironing mat to 45 inches wide. I was able to keep the full length, however. This is important as it will allow me to tie the mat in place at both ends of the table, keeping it in place while ironing high-friction materials.
(Sizing the pieces) An important quilting note that I didn't see until it was too late: your backing should be about 4 inches BIGGER than the finished quilt size (an extra 2 inches all around). This allows you to baste the backing up over the top and hold in the batting, preventing any errant fibers from escaping as you quilt. It also gives some wiggle room when lining up all the layers. Learn from my mistakes, friends.
Materials
The most important thing when choosing materials for an ironing mat is ensuring that your choices will be able to withstand both high temperatures and high moisture. Bluntly: absolutely no poly-based materials allowed! Natural fibers such as cotton, wool, and linen are the way to go here.
(Top and Backing) Since I didn't want to drop a ton of money on my ironing mat, I went with 100% cotton fabric for both the top and the backing.
A note here that the most common width of cotton fabric is 44 inches - just shy of the 46 inches needed for my pieces (finished width of 45 + seam allowance). I was not about to have a single seam down the front of my ironing mat and instead decided to use stashed fabrics and fun fat quarters to add a square border around the outside of the top.

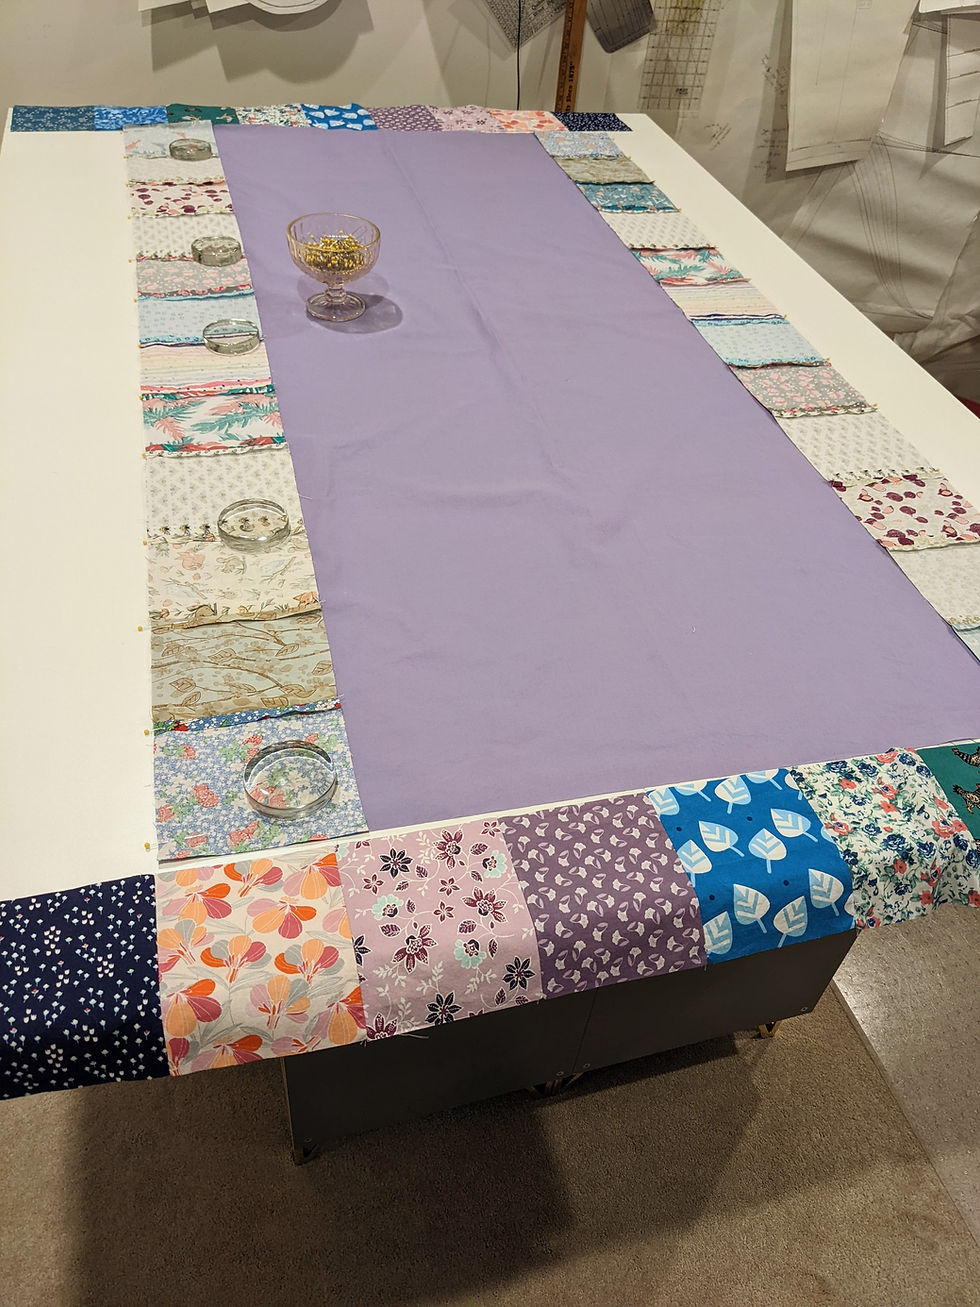
I decided on 5x5 inch squares (6x6 inches with seam allowance) which gave a small dilemma as 72 is not divisible by 5. So, as you will see by looking at my diagram, I included two 6x5 inch rectangles along each of the long sides of the mat. I decided to cut all four of these out of the same fabric so it looks more purposeful. In total, I needed 38 of the 6x6 squares and four of the 7x6 rectangles (including 1/2 inch seam allowances).
Similarly, the fabric wasn't wide enough for the backing to be a single piece. Instead, I used two long strips and added a stripe of contrasting fabric down the center. I made a mistake when cutting out the stripe and so added a little rectangle of scrap fabric to account for the cutting error.
(Batting) This is where there starts to be quite a bit of debate online as to what type of batting is the best choice. Some folks use one layer, others two. Some use cotton and others use wool. Whatever you choose, be sure it is 100% natural fibers. This means no scrim.
Scrim is a lightweight binder used in the manufacturing process to help hold the fibers in place. It's made of a polyester (typically) netting and provides additional structure to the batting, making it less stretchy.

Read the labels and descriptions very carefully as many will say "natural cotton" or "all wool" and then have in very small print that the batting also contains a small percentage of polyester scrim. You may also need/want to check the manufacturer's website as sometimes this information isn't provided on product pages. Since the polyester fibers can melt at high temperatures, they are best to be avoided.
I decided to use a double layer of 100% natural cotton batting from Pellon. Why two layers? Believe it or not, it was actually more cost-effective to buy bagged twin-size batting (there was a sale and I had a coupon) which gave me exactly enough for two layers and about 4 inches of scrap for quilting practice. Two layers also provides additional heat protection to my table. Since I prefer to use natural fibers which require higher heats and steam to press, this seemed like a good idea.
(Insul-bright) The final layer is one that I personally found confusing as it's made of 100% polyester which I just told you to strictly avoid. Insul-bright is different from other polyester battings, however, as the polyester fibers are punched through a reflective metalized polyester film (a very special scrim). The reflective film then acts to reflect the heat waves back at their source, protecting the surface or your hands. It's often used for small quilted items like bowl holders and oven mitts although it is NOT microwave safe.
I was actually so skeptical about this material that I ended up calling The Warm Company's customer service line to make sure it would be able to stand the heat of ironing without melting. The customer service rep (US-based) was very friendly and helpful - she confirmed that Insul-bright is appropriate for an ironing mat.
After purchasing but before pinning everything together, I decided to give it a quick test for effectiveness. I layered my materials together and put my Thermapen on the table underneath. With my iron on the highest setting with full steam, I pressed down solidly for a count of 5, then read the temperature on the probe.
Each test included the thin cotton top and backing. With one layer of cotton batting, it read 160°F. With two layers of the cotton batting, it dropped down to 138°F. With both layers of cotton and the Insul-bright, the table hit 124°F. A significant decrease! While I largely attribute the decrease in temperature to the addition of any extra layer, the Insul-bright was very affordable and I'm hoping that the poly layer will help provide some needed structure to the rest of the ironing mat.
Assembling the Ironing Mat
(Step 1) Cut out all pieces. Label if needed.

(Step 2) If needed, sew your backing pieces together. For me, this meant two 21.5x73 inch strips (including seam allowance) and one 4.5x73 inch strip down the middle to account for the extra width needed. I used a contrasting, patterned fabric for the center strip to add a little interest. Naturally, when I cut out the strip on the fold, I cut off the fold because I wasn't paying attention. So there's an extra scrap in the center in a second contrasting fabric for a little added pizazz. Press open all seams.

(Step 3) Assemble the top. Start by sewing and pressing the seams for the rows of squares/rectangles. The key to this step is to NOT include the corner pieces on the longer sides. Instead, the corner pieces are attached to the short ends. Once all the squares are stitched, sew the long ends to the sides of the center piece. Press the seams open. Now sew the short ends on at either end. Press open the seams.

(Step 4) Layer your materials. Beginning with the bottom layer: the backing (wrong side up!), Insul-bright, cotton batting, another layer of cotton batting, the top (right side up!). After adding each layer, carefully smooth it out to ensure there are no wrinkles and the edges line up as best as possible.
For the cotton batting, I did one layer first, letting the rest of the batting hang off the edge of the table while I smoothed it out and lined up the edges. Then, I folded it back on itself and smoothed out the second layer beginning from the folded edge. Once everything was laying well, I cut along the fold.
I found pattern weights and hem clips to be very useful here. Extra large binder clips would have been even more helpful in clipping everything to the table. Unfortunately, the binder clips I had on hand were just a bit too small.

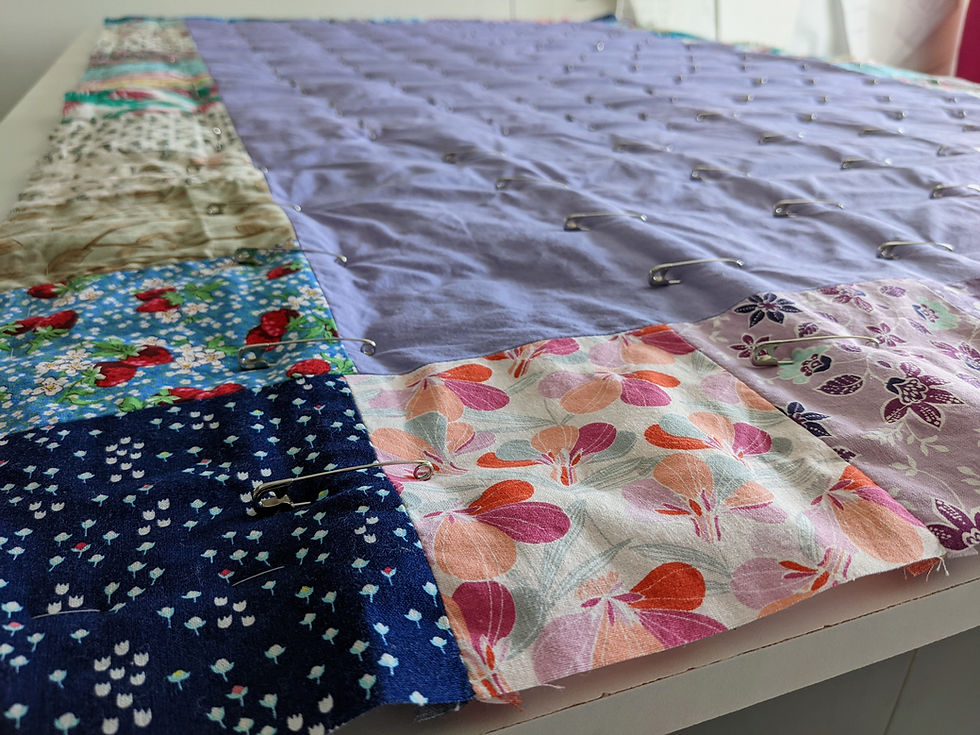
(Step 5) Using quilting safety pins, pin the layers together. Begin in the center of the quilt for this and be sure to go through all layers for each pin! I like to start by making a line across the center the long way and then again across the center the short way. I then filled in each quadrant, working in columns and rows. The pins should be about 4 inches apart and extend to the ends of the mat with about 2 inches of open, unpinned area all the way around.
(Step 6) Baste around the edges either with more safety pins or by hand. This will ensure nothing comes undone or begins to unravel. If you sized your backing correctly (I did not), pull the excess up over the top and baste into place. This will prevent stray fibers from falling out while you quilt.

That's all for now, friends! Part 2 coming soon as I delve into the world of machine quilting for the first time. Be sure to like the post and subscribe to the blog by filling out the form below so you don't miss the next part! You can also follow me on TikTok, Instagram, or Facebook for more updates between posts. See you soon and happy crafting!


A very well explained tutorial 😁
I'm really curious if all of the seams will leave a dent in whatever you're ironing? Have you tested it out? Have you seen the 108" wide cotton fabrics made for quilt backings? Also, do you have something for pressing smaller, curved seams, like a sleeve board or tailor's ham? I really envy you your large craft table, soon to become a fabulous ironing surface!! I make do with an extra wide piece of felt that does extra duty as a wall piece to stick fabric to when planning out my piecing...